Almalence Digital Lens OpenXR Layer Setup for Pico Neo 3 Pro Eye
Introduction
This instruction describes how to set up Almalence Digital Lens OpenXR Layer on Pico Neo 3 Pro Eye VR head-mounted display.
| Hardware requirements | - Pico Neo 3 Pro Eye. - NVIDIA GeForce GTX 1080 or later. |
| Software requirements | - Windows 10 (64-bit) or later. - SteamVR 1.26.6 or later. - Pico Link 1.2.9.1 or later. - (On the HMD) PUI 4.9.6 or later. |
Pico Neo 3 Pro Eye device setup:
- To connect to PC: go to Pico website, and download and install Pico Link for Pico Neo 3 Pro Eye.
- Connect Pico Neo 3 Pro Eye HMD via USB-C port to your computer.
- Copy from (this directory was opened automatically after installation.)
"Your system drive\ProgramData\Almalence\DlvrOpenXrLayer\Customer\Almalence DLVR Bluetooth Link.apk"
to your HMD (for example "Download" folder). Then you can press the "File Manager" button on the bottom bar of your HMD's screen. Next, on the left side, choose" APKs" and install the uploaded "Almalence DLVR Bluetooth Link.apk" by clicking on it. - Pair your HMD via Bluetooth with your PC.
- For Almalence DLVR to work correctly and provide the best experience, you need to calibrate the eye-tracking software on your device. Launch the "Tobii User Calibration" app on your HMD and complete calibration.
- Run “Almalence DLVR Bluetooth Link” on your HMD. The next time you turn on the HMD, before starting the DP connection, you will need to start this app once for DLVR to be able to track your eye pupil (the app will pair with the PC automatically).
SteamVR OpenXR runtime setup:
- In the SteamVR window, click the menu button and go to Settings.
- Go to the Video settings tab and switch the "Render Resolution" option to "Custom." Set the "Resolution Per Eye" option to 100%. For the best experience, the "Resolution Per Eye" parameter should equal 2748 x 2880 or near that value.
- Open the "OpenXR" tab and make sure that "Current OpenXR Runtime" is set to "SteamVR." If it is not, click the "Set SteamVR as OpenXR Runtime" button.
In older versions of SteamVR, at the bottom of the window, switch "Advanced Settings" to "Show," and you can find the "Set SteamVR as OpenXR Runtime" button in the "Developer" section.
Launch your app
Almalence OpenXR Layer will be automatically enabled if:
- Your app supports OpenXR runtime.
- Your app uses the following graphics API: DirectX11/12, Vulkan.
- You have made the settings described above.
In case installation and configuration were sucessful, you will see the following message when launching any OpenXR-compatible app:
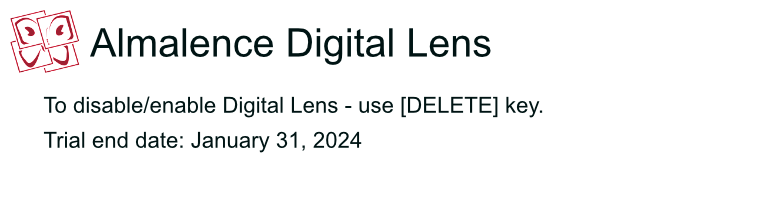
The best way to see the effect of the Digital Lens plugin is to toggle it on/off by using [DELETE] button on your PC keyboard.
The effect of Almalence DLVR is best observed in high-resolution textures and scenes with lots of fine details.
Any OpenXR-compatible application shall work with Almalence OpenXR Layer. Just in case, below are a few applications that have been tested:
- Microsoft Flight Simulator
- Beat Saber v1.29.4 and late
- Treekeepers
- FlashOut
- Blender (VR plugin)
Questions, troubleshooting, and support:
If you have any questions, you can contact support: dlplugin@almalence.com
Uninstalling or disabling Almalence OpenXR Layer
In SteamVR 1.26.6 and later versions, you can disable Almalence OpenXR Layer in the OpenXR tab in the SteamVR settings. With previous versions of SteamVR, you will have to uninstall the layer using Windows Add/Remove Programs function.